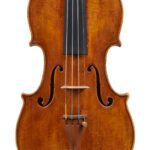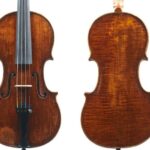


It’s time to change your violin strings, but how to choose them and how to do it
Back to BlogBeing a violinist means taking care of your instrument and its fittings and accessories. That includes the strings, and one thing that can make some violinists a bit confused is the topic of changing them. When to change them? How? And which ones to pick?
In this blog, we aim to help you and answer any questions you may have.
Changing the violin strings – the time has arrived…
Knowing when to change your violin’s strings is the first step and a significant one. When your violin strings begin to produce a dull sound, show signs of depletion, or you find yourself constantly needing to retune your instrument, it’s time to start thinking about changing your violin’s strings.
Most violinists change their strings every 300 playing hours or so. If you are a student that will be about every three to six months. More advanced students and professionals change strings more frequently. Consequently, the time really depends on your hours of practice.
For example, a professional and an advanced student who play a lot (all day long) and want to keep their instrument in top condition will need to change the strings monthly. On the other hand, if you play around 3 to 4 hours daily, you might need to change them every 3 to 4 months, and if you play for only an hour a day you’ll be able to change the strings every 6 to 12 months.
But then it comes to finding the right violin strings
Now you know when the right time to change your violin’s strings is! Still, you may not know which strings to change to, but don’t worry we got you covered. Let’s talk about finding the right string. There is a multitude of different brands and types of strings on the market today and you may need to make a few considerations beforehand.
Having the right set can make a massive difference, as you can get different brightness, tonal quality, and tension. Our advice is first to set your budget and what kind of sound/timbre you are looking for.
Strings manufacturers offer a massive range of possibilities, with characteristics such as bright, dark, warm, clear, etc. The strings have the power to enrich the instrument’s tone. The violin string charts can really help you here.
We don’t recommend strings with too much tension, they can cause the instrument to lose resonance due to excessive pressure on the top.
When searching for just the right violin string, players frequently use terms as bright, dark, brilliant, edgy, dull, etc. But consider that different people mean different things when they use these words; unfortunately, we don’t have a good, common vocabulary. Everyone has different ears and different tastes, so it is difficult to precisely define their perception of sound. But, as a broad generalization, players mainly use these words to describe how frequencies are emphasized or subdued.
So maybe it would be interesting to research the sounds before deciding anything.
There is a wide range of strings, but here are some examples:
- High-tension synthetic strings with a composite core are usually rich, complex, powerful, bring projection, wide dynamic range, and a wide range of nuanced tone colors.
- Genuine Gut Strings bring more of a complexity of tone and a rich, organic sound.
- Medium-Tension Synthetic Strings make it easy to play and a beautiful tone.
How to change the violin strings
This step can be tricky and challenging. If you have never changed strings before, you can always ask for help from your teacher or a professional to walk you through the process.
Here we will give you some instructions:
1. Lubricate the nut.
The strings groove on the bridge and the strings groove on the upper nut will need lubricating with a soft graphite 6b. This will help improve the durability of the strings and reduce tension in the pegs.
2. Change the strings one at a time.
We have found it is best to lower the tension a little bit on the E string and change the G string first; then, we tune it. Next, change the E string and tune it again, change the D string, tune it, and finally change the A string. After each is done, tune the entire instrument. In this way you can check each string is changed correctly as you go.
3. The bridge must always form a 90º angle with the table.
Right after the instrument is wholly tuned, check if the bridge is in the correct position. The angle can be checked by using a bookmark or anything else with a 90º corner that is thin and straight. Correct the position so that the angle of the strings can become as equal as possible.
4. Wrap the strings as closely as possible to the pegbox cheek.
Wrap the strings around the peg and leave it leaning against the pegbox cheek. This helps hold the pegs in when the weather is dry and makes the instrument’s tuning much more effortless.
5. Don’t forget to lubricate the pegs.
Take advantage of the opportunity to lubricate the pegs with a suitable lubricant. There are specialist tuning lubricants suitable for violins/violas and cellos, which we would recommend to ensure you don’t damage your instrument.
6. Clean off any sweat by rubbing the string with a cloth until it warms up
As you play, the sweat from your hands will penetrate the strings, causing them to oxidize from the inside out. This causes the strings to lose their initial shine gradually. By heating them with friction, some of the moisture will evaporate, minimizing oxidization within the strings.